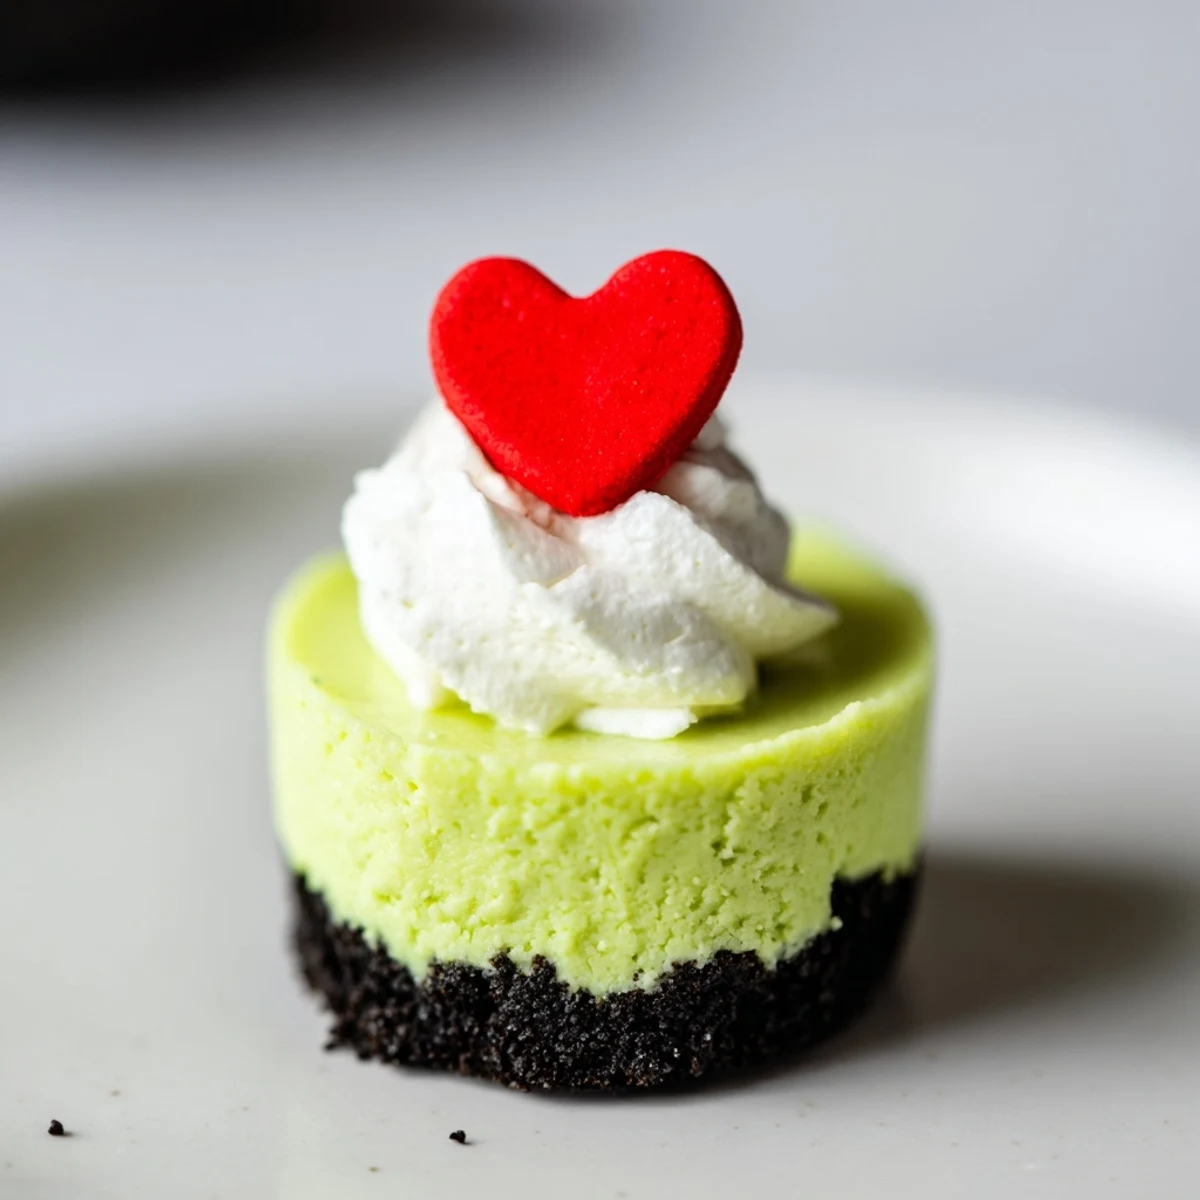
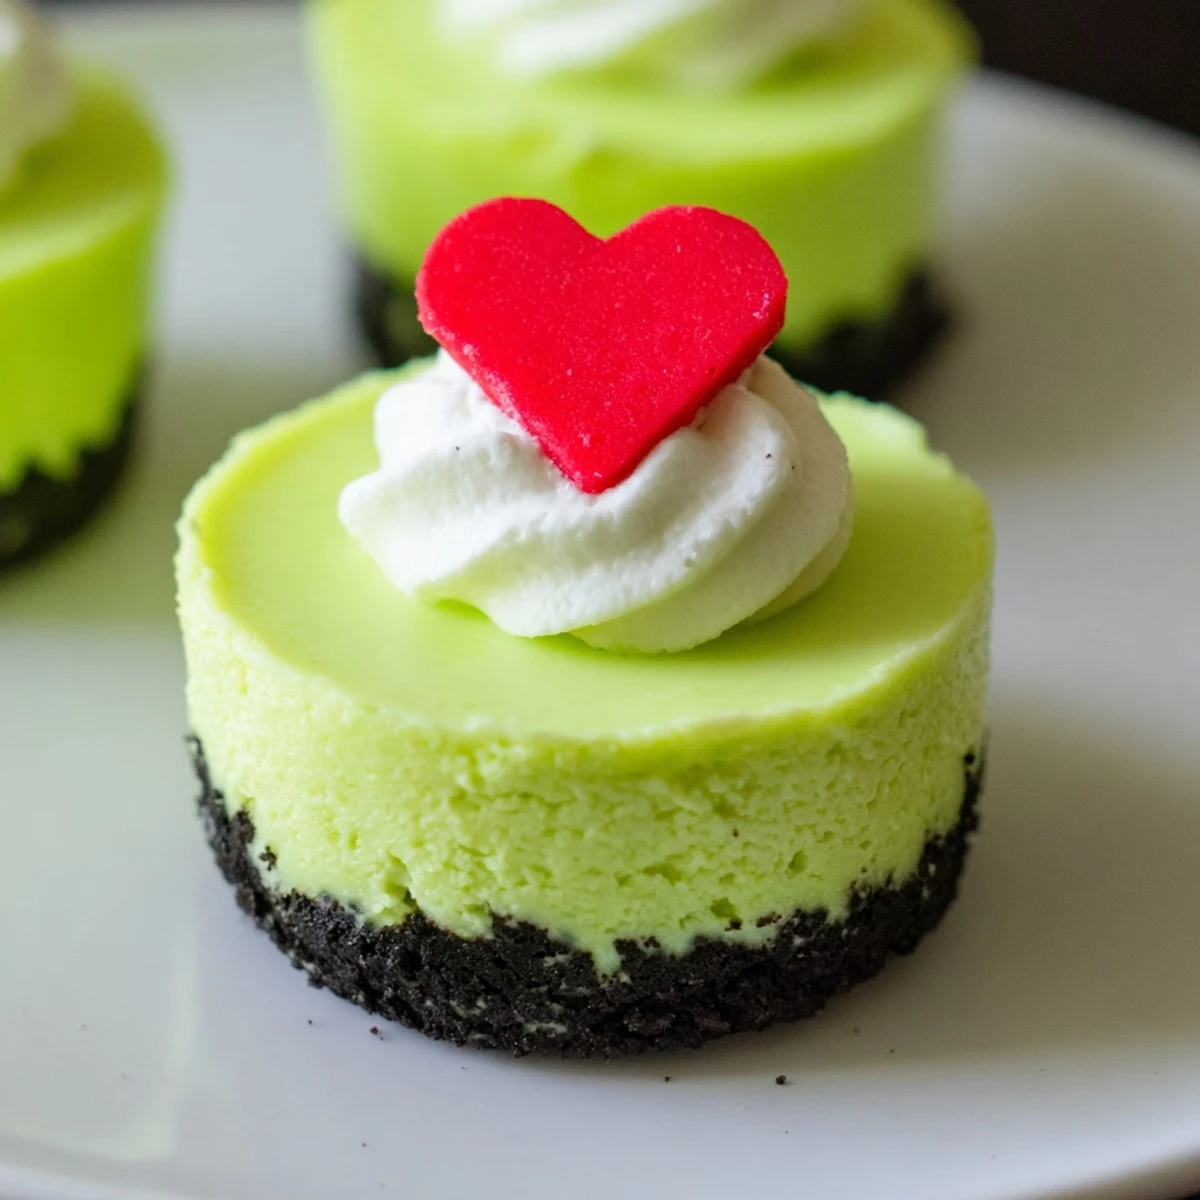
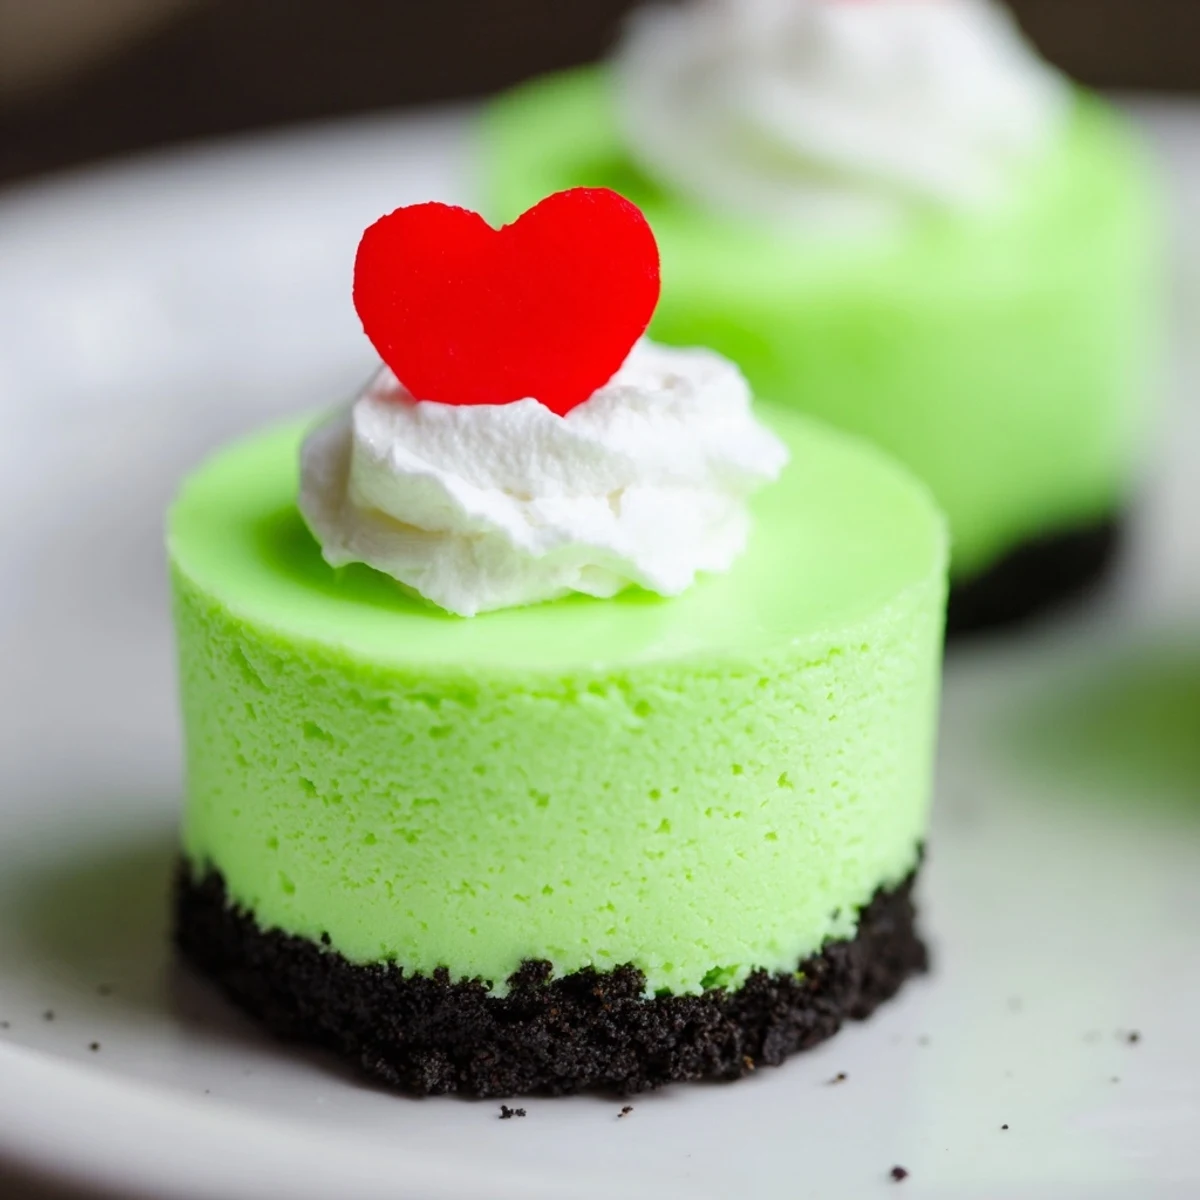
Grinch Mini Cheesecakes

Featured in: Sweet Tooth Fix

These neon green mini cheesecakes feature a crumbly Oreo crust and a smooth, creamy filling highlighted by a festive green hue. The delightfully sized treats bake quickly and chill to a perfect firmness, ready to be topped with whipped cream and sprinkles for a fun holiday touch. Simple preparation and eye-catching colors make them ideal for holiday gatherings or festive dessert tables.

Updated on Sat, 22 Nov 2025 16:59:00 GMT
Vibrant green Grinch Mini Cheesecakes, topped with whipped cream and festive red sprinkles, look so delicious! Save
Vibrant green Grinch Mini Cheesecakes, topped with whipped cream and festive red sprinkles, look so delicious! | tastyeffect.com

Impress all of the Whos at your Christmas party with these fun and festive neon green mini cheesecakes—perfectly sized, irresistibly creamy, and bursting with holiday cheer!

This is a favorite at our holiday gatherings and always brings smiles to everyone's faces.

Ingredients

  • Crust: 1 cup Oreo cookie crumbs (about 10–11 cookies), 2 1/2 tbsp unsalted butter, melted
  • Cheesecake Filling: 16 oz (2 packages) cream cheese, softened, 1/2 cup granulated sugar, 2 large eggs, 1 tsp vanilla extract, Neon green food coloring (gel recommended)
  • Optional Toppings: Whipped cream, Festive sprinkles or red heart sprinkles (for the true Grinch look)

Instructions

Step 1:
Preheat oven to 350°F (175°C). Line a standard 12-cup muffin pan with paper liners.
Step 2:
Prepare the crust: In a food processor, pulse Oreo cookies to fine crumbs. Add melted butter and pulse again until the mixture resembles wet sand.
Step 3:
Divide the crumb mixture evenly among the liners (about 1 tablespoon per cup) and press down firmly with the back of a spoon or a small glass.
Step 4:
In a medium bowl, beat softened cream cheese and sugar with an electric mixer until smooth and creamy.
Step 5:
Add eggs one at a time, beating on low after each addition, then mix in vanilla extract.
Step 6:
Add neon green food coloring, a little at a time, until your desired Grinchy shade is reached.
Step 7:
Spoon about 1/4 cup cheesecake batter into each liner, filling them almost to the top.
Step 8:
Bake for 1517 minutes, until the centers are mostly set but still slightly jiggly.
Step 9:
Remove from oven and cool completely in the pan. Then refrigerate for at least 2 hours, or until firm.
Step 10:
Before serving, top with whipped cream and festive sprinkles if desired.
These adorable, creamy Grinch Mini Cheesecakes are a perfect holiday dessert, ready to enjoy anytime. Save
These adorable, creamy Grinch Mini Cheesecakes are a perfect holiday dessert, ready to enjoy anytime. | tastyeffect.com

These mini cheesecakes have become a tradition my whole family looks forward to every year.

Notes

For a classic Grinch look, use a single large red heart sprinkle on each cheesecake. Oreo cookies can be replaced with chocolate graham crackers for a slightly different crust.

Required Tools

12-cup standard muffin pan, Paper cupcake liners, Food processor, Mixing bowls, Electric mixer, Measuring cups and spoons

Allergen Information

Contains dairy (cream cheese, butter) eggs and wheat (Oreos). Double-check labels for possible nut or soy traces if allergies are a concern.

Close-up shot shows a batch of homemade Grinch Mini Cheesecakes ready to serve and impress everyone. Save
Close-up shot shows a batch of homemade Grinch Mini Cheesecakes ready to serve and impress everyone. | tastyeffect.com

Enjoy these festive treats as a standout holiday dessert that delights everyone at your party.

Recipe FAQ

What ingredients create the crust for these mini cheesecakes?

The crust is made from Oreo cookie crumbs combined with melted unsalted butter for a rich, crumbly base.

How is the neon green color achieved in the cheesecake filling?

Neon green gel food coloring is added gradually to the cream cheese mixture until the desired vibrant shade is reached.

What is the recommended baking time and temperature?

Bake at 350°F (175°C) for 15 to 17 minutes until the centers are mostly set but still slightly jiggly.

Can these cheesecakes be prepared ahead of time?

Yes, they can be made 1–2 days in advance and stored refrigerated to maintain freshness.

What finishing touches enhance the presentation?

Before serving, top with whipped cream and festive sprinkles or a single large red heart sprinkle for a classic Grinch look.

Grinch Mini Cheesecakes

Vibrant, creamy mini cheesecakes with colorful green filling and festive toppings, perfect for sharing.

Prep duration
20 min
Cook duration
17 min
Complete duration
37 min
Created by Jane Miller


Skill level Easy

Heritage American

Output 12 Portions

Dietary requirements Meat-free

Components

Crust

01 1 cup Oreo cookie crumbs (approximately 10–11 cookies)
02 2 1/2 tablespoons unsalted butter, melted

Cheesecake Filling

01 16 ounces cream cheese, softened
02 1/2 cup granulated sugar
03 2 large eggs
04 1 teaspoon vanilla extract
05 Neon green gel food coloring, as needed

Optional Toppings

01 Whipped cream
02 Festive sprinkles or red heart sprinkles

Directions

Phase 01

Preheat and prepare muffin pan: Preheat the oven to 350°F. Line a 12-cup standard muffin pan with paper liners.

Phase 02

Create crust base: Pulse Oreo cookies in a food processor until finely ground. Add melted butter and pulse until mixture resembles wet sand.

Phase 03

Form crust in liners: Divide the crumb mixture evenly into liners, about 1 tablespoon per cup, pressing firmly with the back of a spoon or a small glass.

Phase 04

Prepare cheesecake filling: Beat softened cream cheese and sugar with an electric mixer until smooth and creamy.

Phase 05

Incorporate eggs and flavor: Add eggs one at a time, mixing on low speed after each addition. Then blend in vanilla extract.

Phase 06

Add color: Gradually add neon green gel food coloring until desired vibrant hue is achieved.

Phase 07

Fill liners with batter: Spoon approximately 1/4 cup of filling into each liner, filling nearly to the top.

Phase 08

Bake: Bake for 15 to 17 minutes until centers are mostly set but slightly jiggly.

Phase 09

Cool and refrigerate: Remove from oven, cool completely in the pan, then refrigerate for at least 2 hours or until firm.

Phase 10

Add toppings and serve: Before serving, optionally garnish with whipped cream and festive sprinkles.

Necessary tools

  • 12-cup standard muffin pan
  • Paper cupcake liners
  • Food processor
  • Mixing bowls
  • Electric mixer
  • Measuring cups and spoons

Allergy details

Review each component for potential allergens and seek professional healthcare advice if uncertain.
  • Contains dairy, eggs, and wheat; may contain traces of nuts or soy.

Nutritional information (per portion)

These values are approximate guides only and shouldn't replace professional medical consultation.
  • Energy: 220
  • Fats: 15 g
  • Carbohydrates: 19 g
  • Proteins: 3 g