 Save
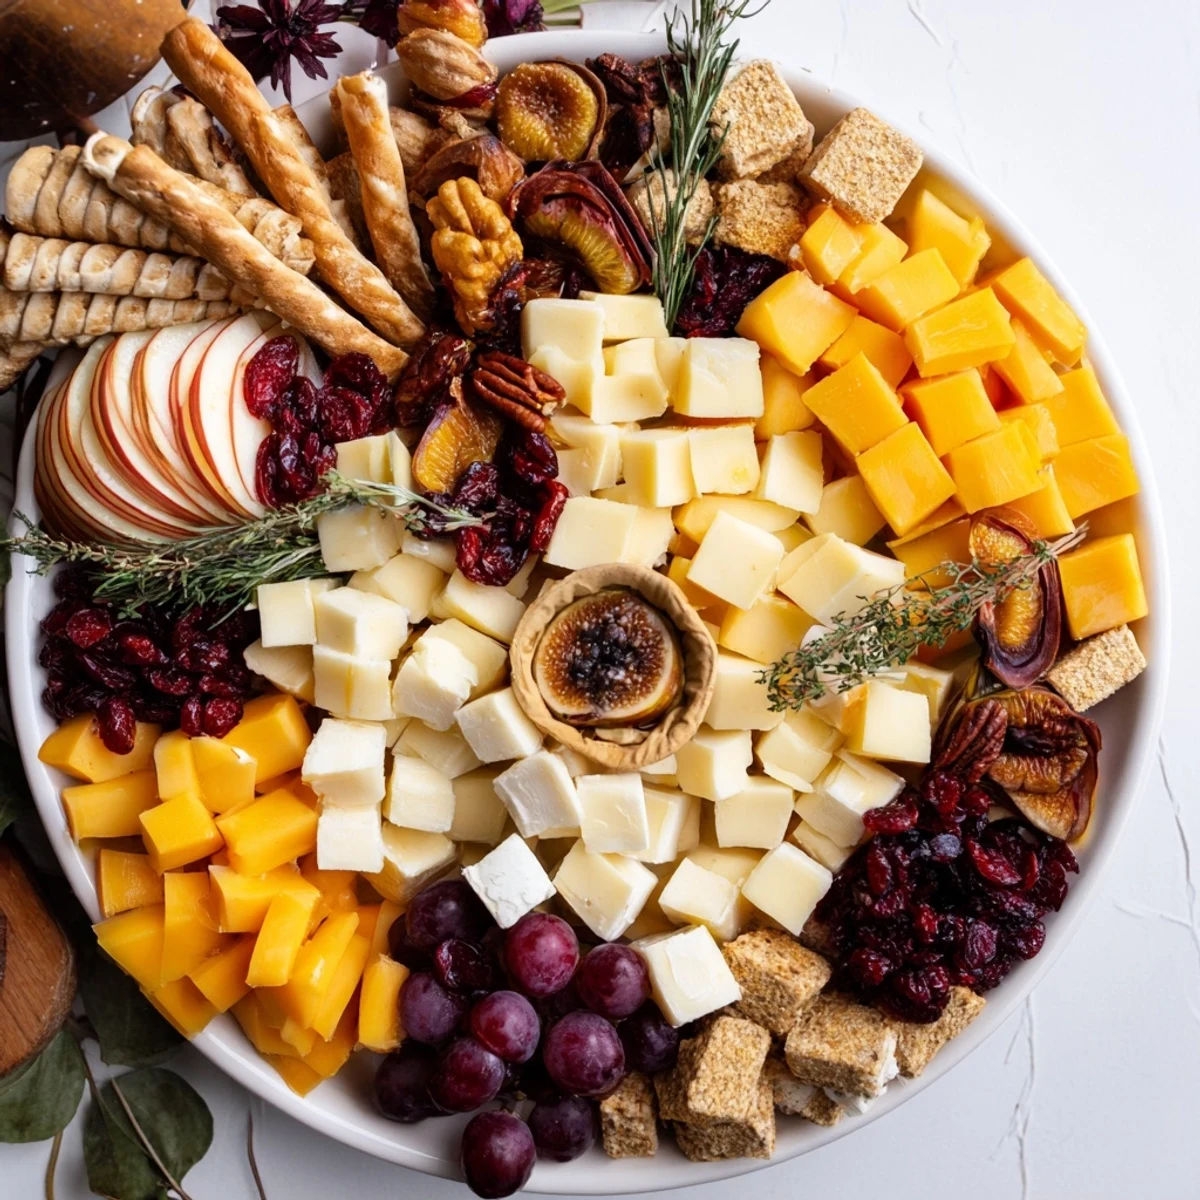
Save I'll never forget the first time I saw a cornucopia centerpiece at my grandmother's Thanksgiving table—it wasn't just food, it was art. The way the cheeses tumbled out alongside jewel-toned dried fruits and roasted nuts created this sense of abundance that made everyone pause before diving in. Years later, I realized I could recreate that magic in my own kitchen, and now this edible horn of plenty has become my signature way to welcome guests into the harvest season. There's something deeply satisfying about building something so visually stunning that's also meant to be eaten and shared.
I made this for a small Thanksgiving gathering during a particularly stressful season, and watching my usually quiet uncle actually engage in conversation while selecting cheese and dried figs reminded me why we gather around food. Everyone was reaching, tasting, talking, laughing—and the centerpiece just kept giving. That's when I knew this wasn't just pretty; it was powerful.
Ingredients
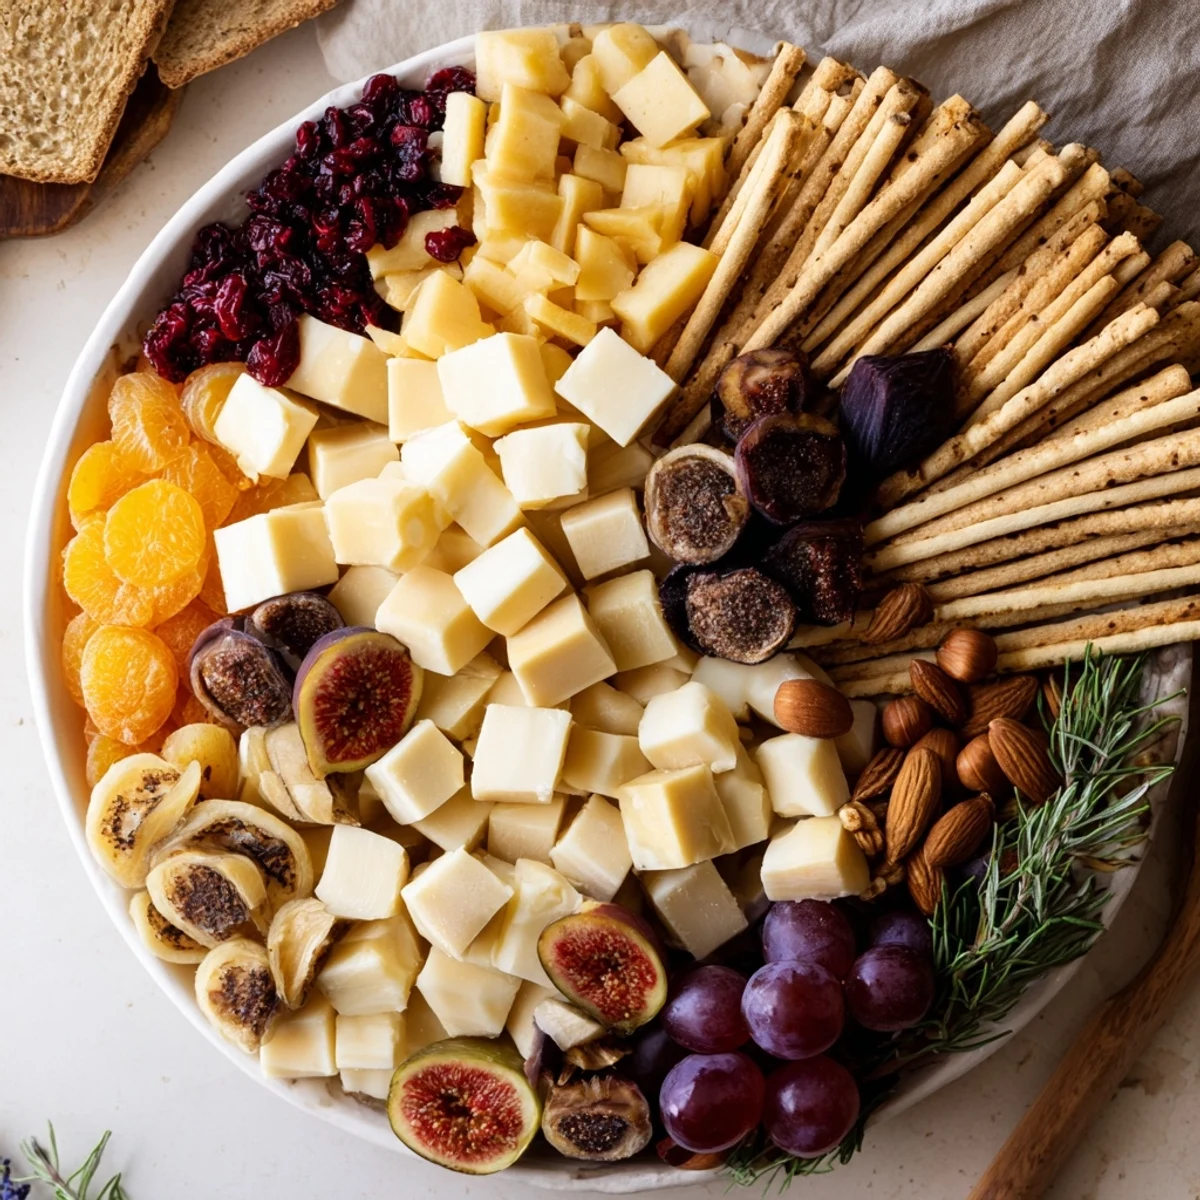
- Dried apricots, figs, cranberries & apple rings (1 cup each): These are your jewels—their natural sweetness and deep colors create visual drama. Buy the nicest looking ones you can; they're what everyone first notices. The variety of fruits also ensures you're hitting different flavor notes, from tart cranberry to rich fig.
- Seedless grapes (1 cup, optional): I add fresh grapes for a pop of bright color and a juicy contrast to the chewy dried fruits. They're totally optional, but they remind guests that fresh fruit belongs on this board too.
- Walnuts, pecans & almonds (1 cup each): Toast them lightly if you want deeper flavor, or keep them raw for a cleaner taste. The mix of sizes and shapes creates texture that's more interesting than using just one type.
- Aged cheddar, creamy goat cheese, blue cheese & aged gouda (6 oz each): This is where you get bold. Mix a sharp cheese with something creamy, something pungent, and something smooth. Each cheese tells a different story and gives your guests options. If blue cheese isn't your thing, swap in a smoked gouda or aged manchego.
- Rustic crackers & baguette slices (2 cups crackers, 1 small baguette): These are the vehicles for everything else. I prefer thicker, hearty crackers that won't break under the weight of cheese, and I always have some toasted bread nearby as backup.
- Fresh rosemary & thyme sprigs, edible flowers (optional): These aren't just for looks—they add a whisper of herbal scent and remind people that this is a celebration of the season. Tuck them in thoughtfully, as if you're composing a still life.
- Cornucopia basket or homemade bread horn: This is your vessel and your statement. A wicker basket is easiest, but an edible bread horn (shaped and baked ahead) makes the whole thing even more impressive and delicious.
Instructions
- Set Your Stage:
- Place your cornucopia or bread horn in the center of your largest, most beautiful serving platter or wooden board. This is your foundation. Step back and look at it—you're about to fill it with intention, not just stuff.
- Begin with the Cheeses:
- Arrange your cheeses inside the horn's opening first, letting some pieces deliberately spill outward and downward, as if the horn is overflowing with abundance. Cube and crumble them beforehand, but place them with intention—you want to see the variety of colors and textures right away.
- Layer in the Dried Fruits & Nuts:
- Now comes the fun part—imagine you're painting with food. Arrange the dried fruits and nuts in loose sections around and spilling from the horn. Mix colors thoughtfully; don't let all the dark figs bunch together. Let pieces cascade down the sides naturally. This isn't rigid; it's organic and abundant.
- Tuck in the Crackers & Bread:
- Lean crackers against the horn's sides and tuck bread slices into pockets among the fruits and nuts. They should look like they're emerging from the cornucopia, ready to be grabbed and used. Leave some visible and accessible—guests should know they're there.
- Add the Finishing Touches:
- Tuck fresh rosemary and thyme sprigs throughout, letting their green soften the golden and jewel tones. If you have edible flowers, add just a few—you want them noticed, not overwhelming. Step back. This should look like a harvest dream that somehow made it to your table.
- Serve with Ease:
- Bring it to the table and let it be the first thing everyone sees. Have small plates nearby, maybe some cheese knives, and let your guests simply pick, taste, and enjoy. Room temperature is perfect; nothing's been cooked, so nothing needs to cool or heat up.
 Save
Save There's a moment that always happens when I unveil this centerpiece: a pause. Everyone stops talking for just a beat, taking it in. That silence before the reaching and tasting begins is when I know I've created something that feels special. That's the real magic of this recipe—it's not just sustenance; it's a memory being made before anyone even takes a bite.
Choosing Your Cheeses
This is where your personal taste wins. I've learned that the best boards balance contrast—you want something sharp to wake up your palate, something creamy to soothe it, and something interesting you might not normally buy for yourself. The aged cheddar is your familiar friend, the goat cheese is your smooth sophisticate, the blue cheese is your bold statement, and the gouda is your reliable crowd-pleaser. But if you love brie, add brie. If you prefer aged manchego or smoked cheese, make that swap. The rules here are your own preferences, not mine.
Making an Edible Bread Horn
If you want to go all in and make your cornucopia actually edible, here's how I do it: I wrap foil tightly around a cone shape (or buy a metal cone), brush it generously with oil, and wrap bread dough around it in a spiral, sealing the seams as I go. Bake at 375°F for about 30–40 minutes until golden and hollow-sounding when tapped. The result is a vessel you can actually break into and eat, which makes the whole thing even more special. It's simpler than it sounds, and your guests will be genuinely impressed.
Timing & Pairing
This board loves company and flexibility. I set it out 30 minutes before people arrive so it can breathe and the flavors settle into themselves. Serve it with a medium-bodied red wine—a pinot noir or a lighter cabernet—or reach for sparkling cider if you want to stay alcohol-free. I've also paired it with a good craft beer, and surprisingly, it works beautifully. The key is letting your guests graze at their own pace, returning to it throughout the gathering rather than eating it all at once.
- Pour yourself a small taste of wine and try a bite of each cheese with its natural partner; you'll understand the board's intention better
- If your guests include anyone with nut allergies, keep a small separate plate of cheese and fruit nearby—they deserve the abundance too
- This board actually improves slightly as it sits; the cheeses warm up just enough to reveal more flavor, and flavors meld together in the best way
 Save
Save This recipe is really about giving yourself permission to create something beautiful and abundant without stress. That's the harvest season gift to yourself.
Recipe FAQ
- → What is the best way to prepare the edible horn base?
Shape bread dough around a foil cone and bake until golden brown. Allow it to cool completely before filling with fruits, nuts, and cheeses.
- → Can I substitute the nuts in this arrangement?
Absolutely. Feel free to swap walnuts, pecans, or almonds with your preferred nuts or seeds to suit dietary needs or personal taste.
- → How should I serve this centerpiece?
Serve at room temperature to allow the cheeses and dried fruits to bring out their full flavors. Guests can pick and choose their favorite combinations.
- → Are there any suggested accompaniments?
Pair with medium-bodied red wine or sparkling cider, and offer honey, fig jam, or apple butter on the side for added sweetness.
- → Is this harvest centerpiece suitable for gluten-free diets?
Yes, if gluten-free crackers or bread are used in place of the rustic varieties, making it safe for gluten-sensitive guests.