
Few breakfast foods are as cherished and versatile as the beloved English muffin. Renowned for their golden, crispy exterior and soft, airy interior, English muffins have become a staple on breakfast tables worldwide. From classic buttered versions to inventive toppings like avocado and smoked salmon, their adaptability is unmatched. But, have you ever wondered *how to make English muffins* from scratch? This simple process delivers delightful results, every time.
In this guide, you’ll discover everything you need to know: the history of English muffins, the essential ingredients, and the tools required for crafting these iconic breakfast rounds. Master the step-by-step method and create English muffins so perfect they’ll rival store-bought counterparts. Let’s dive into the wonderful world of English muffins!
Essential Ingredients for English Muffins
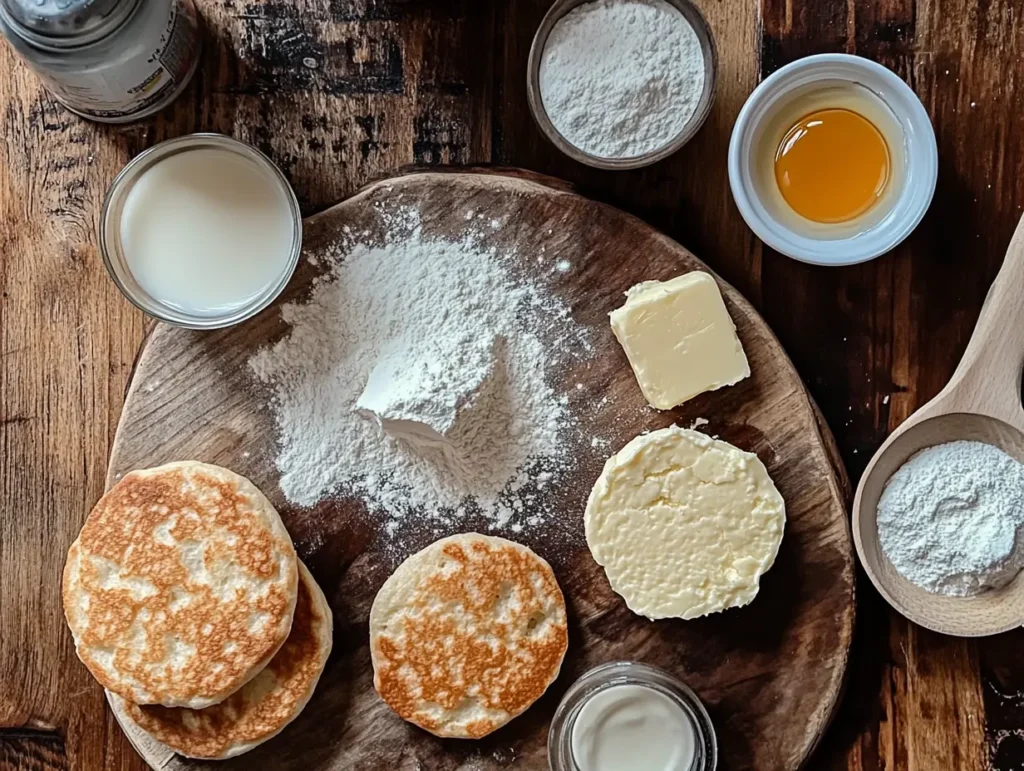
Creating the perfect English muffins begins with high-quality ingredients. Understanding these simple components will ensure your muffins are light, chewy, and flavorful. Here’s what you’ll need:
- Flour: Bread flour is ideal, as it contains enough protein to develop gluten for structure. However, all-purpose flour works for a softer crumb.
- Yeast: Active dry or instant yeast helps the dough rise, creating those iconic air pockets.
- Milk: Provides a soft texture and subtle sweetness.
- Butter: Adds richness and enhances flavor. Unsalted butter is recommended for better control of salt content.
- Sugar: A touch of sugar activates the yeast and balances the savory notes.
- Salt: Balances flavors and strengthens the gluten in the dough.
The key to success lies in ingredient quality. Fresh yeast ensures a good rise, while high-protein bread flour delivers the right structure. Prioritizing premium ingredients is the first step to mastering *how to make English muffins* that are both tasty and homemade.
Tools and Equipment Needed
Every good baker knows the value of the right tools. Successfully learning *how to make English muffins* relies on proper equipment to achieve perfect texture and consistency. Here’s what you’ll need:
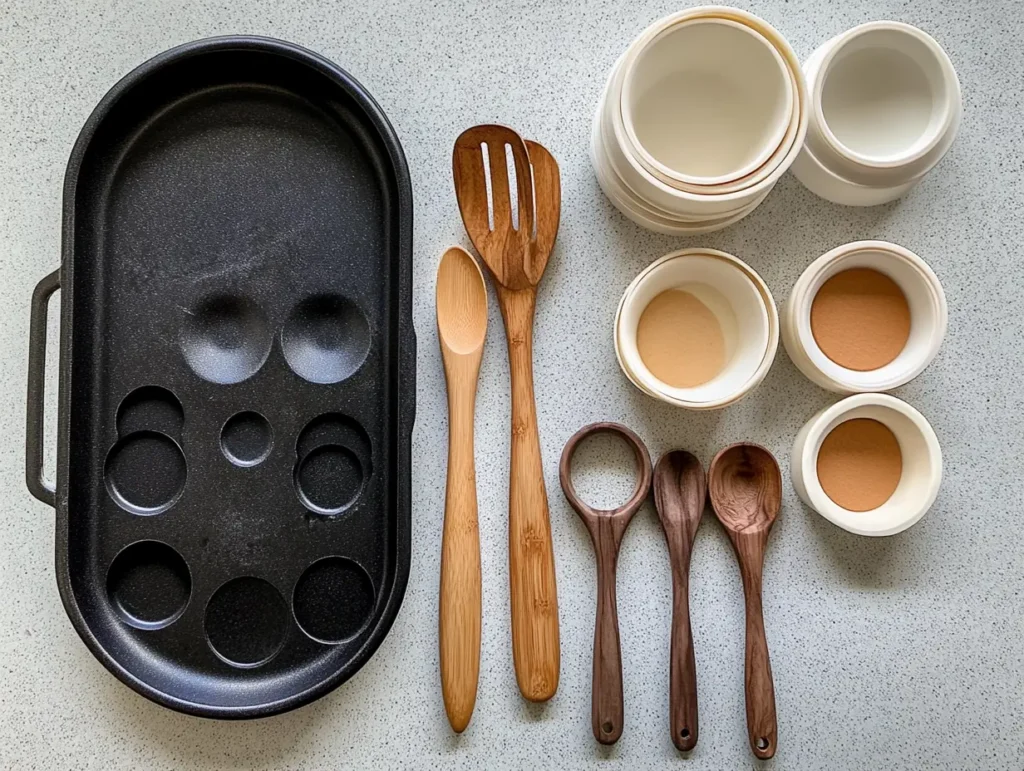
Basic Tools
- Mixing Bowls: A set of bowls for combining and proofing dough.
- Wooden Spoon: For mixing ingredients without overworking the dough.
- Griddle or Skillet: Key for cooking the muffins; cast-iron or non-stick options work best.
- Measuring Cups and Spoons: Precision makes a notable difference in baking.
Optional Gadgets
- Silicone or Metal Rings: Keeps muffins shaped during cooking.
- Stand Mixer: If you want to avoid kneading by hand, this can be a game-changer.
- Kitchen Thermometer: Ensures the perfect cooking temperature for even cooking.
While simple tools suffice, experimenting with additional gadgets can elevate your experience. Investing in quality utensils can make the process smoother and enhance your final results.
Step-by-Step Guide: How To Make English Muffins
If you’re wondering how to make English muffins from scratch, this easy guide will break down every step. Unlike store-bought options, homemade English muffins are softer, fresher, and packed with flavor. Follow these detailed steps to create the perfect batch at home, even if you’re a beginner in the kitchen.
Preparing the Dough
The foundation of any great muffin is well-prepared dough. Start by combining warm milk, sugar, and yeast in a bowl. Let it sit for 5 minutes until frothy, allowing the yeast to activate. Add flour, salt, and melted butter, then mix until you achieve a shaggy dough. Knead the dough for about 8-10 minutes, either by hand or using a stand mixer with a dough hook attachment. A smooth, elastic texture is the goal. For best results, use bread flour as it provides structure and chewiness.
Transitioning between steps smoothly ensures no detail goes missed. If the dough feels sticky, sprinkle in a little extra flour, but avoid overloading it. Once done, place the dough into a greased bowl, cover with a damp cloth, and allow it to rise for 1-2 hours in a warm spot.
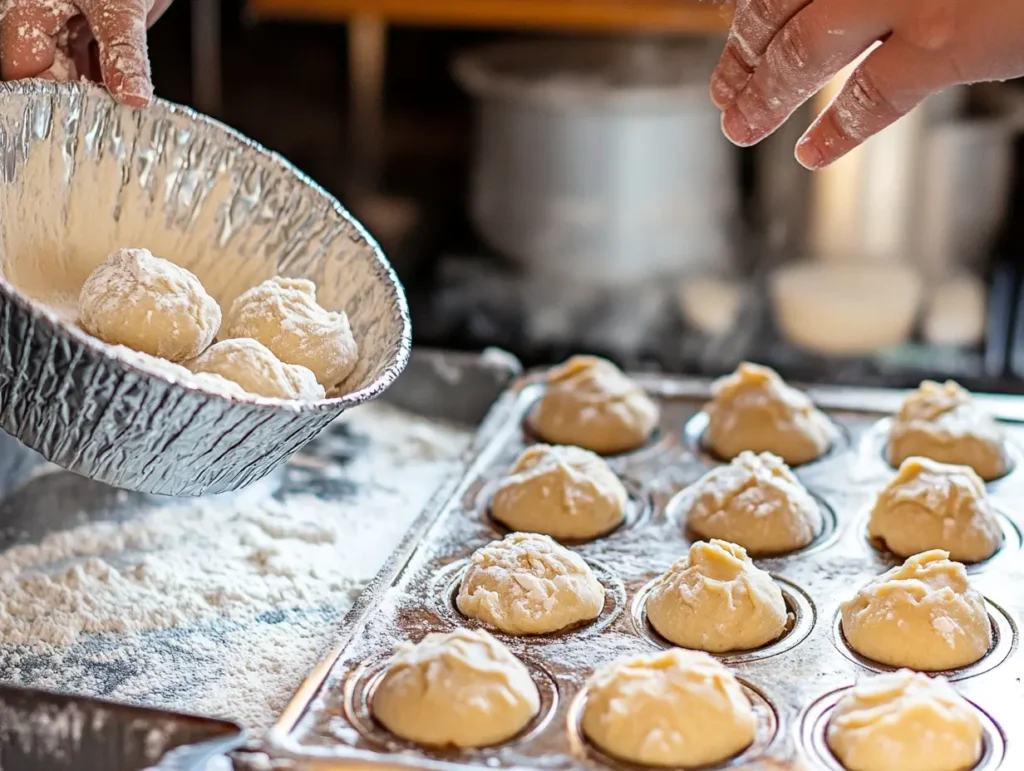
Rising and Shaping
After the first rise (the dough should double in size), punch it down gently to release air bubbles. Roll the dough to about ½ inch thickness on a floured surface. With a round cutter (around 3-4 inches in diameter), cut out rings and place them on a parchment-lined baking sheet. Cover them loosely and let them rise for another 30-40 minutes. This second rise is critical for achieving those airy nooks and crannies English muffins are famous for.
Pro Tip: Use silicone or metal griddle rings to help shape consistent, professional-looking muffins. Uniform thickness ensures even cooking!
Cooking to Perfection
Cooking English muffins on a griddle or skillet gives them their signature toasty finish. Preheat your skillet over medium-low heat and lightly grease it with butter or oil. Place the muffins onto the skillet and cook for roughly 7-10 minutes per side. They should develop a golden crust while remaining soft inside. Lower the heat if they brown too quickly—it’s better to cook them gently to ensure the centers bake through completely.
Avoid overcooking as this can make the muffins dry. Once done, cool them on a wire rack before splitting them with a fork and serving.
Tips for Perfect Texture and Rise
The secret to achieving restaurant-style English muffins lies in attention to detail. By following these tips, you’ll strike the perfect balance between soft insides and firm exteriors. Not only will you enhance the process, but you’ll also avoid common pitfalls.
Achieving the Right Consistency
Hydration is key when preparing your dough. Keep the liquid-to-flour ratio balanced for pliability without making the dough too sticky. Dough that’s too dry struggles to rise properly, while overly wet dough can collapse during shaping. Use bread flour for elasticity and gluten structure, and knead thoroughly to promote smoothness. If you’re unsure about consistency, perform the “windowpane test”—stretch a small piece of dough until it forms a thin, see-through layer without breaking.
Ensuring Proper Rise
Environmental factors, such as room temperature, play a significant role in yeast activity. Yeast thrives in warm, humid spaces, so use a slightly preheated (not hot) oven or warmer corner of your kitchen for proofing. Be patient and avoid rushing through rising times; this step is essential for developing texture and flavor. If your dough isn’t rising, try placing it near warm water or adding a pinch more yeast to your mixture.
Additionally, resist the urge to skip the second rise! This step creates the air pockets essential for English muffin nooks and crannies.
Common Mistakes and How to Avoid Them
Even experienced bakers can face challenges when learning how to make English muffins. By recognizing these mistakes ahead of time, you’ll navigate potential hurdles and make a flawless batch every time.
Overproofing or Underproofing
One common mistake is overproofing, which occurs when dough rises too long, causing it to collapse. Underproofing, on the other hand, leads to dense muffins with minimal air pockets. To find the sweet spot, look for dough that has doubled in size and gently springs back when poked. Use a timer to track rising times, avoiding excessive delays.
Incorrect Cooking Temperature
Cooking at too high a temperature can scorch the muffins’ surface while leaving the inside undercooked. Conversely, low heat may dry them out without providing that signature golden finish. To mitigate this, start with medium-low heat and adjust accordingly. Always err on the side of lower, longer cooking to prevent burning.
If you’re unsure, test-cook a single muffin first to fine-tune your skillet temperature before committing to the whole batch.
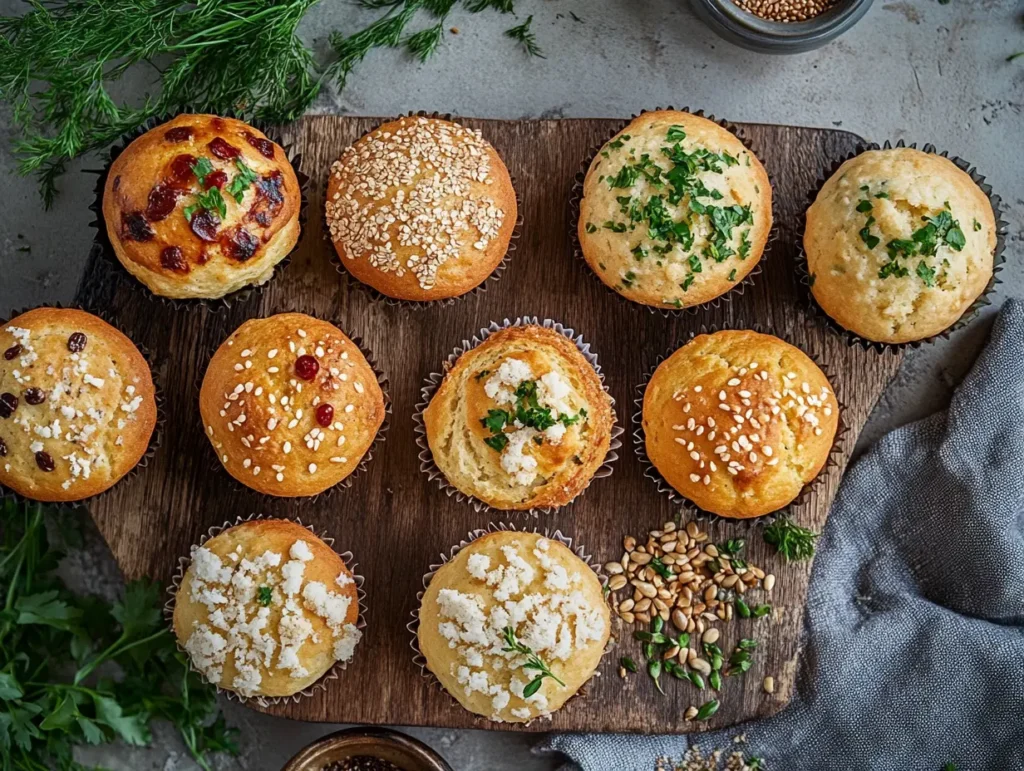
Creative Variations of English Muffins
Why stop at plain English muffins when there are endless possibilities for customization? Experiment with unique flavors and dietary adaptations to match any preference.
Flavored Muffins
Infuse your dough with ingredients like crushed garlic, shredded cheese, or chopped herbs for a savory twist. Spices like cinnamon or nutmeg work beautifully for a sweeter version. For a burst of flavor, add chopped dried fruits such as cranberries or apricots to the dough before proofing.
Pro Tip: Brush a mixture of melted butter and garlic over cooked muffins for a gourmet finish.
Whole Grain and Gluten-Free Options
If you’re catering to specific dietary needs, don’t worry—English muffins can still be on the menu. Substitute whole wheat flour for half of the bread flour to create a hearty, nutty flavor. For gluten-free muffins, use a gluten-free flour blend and add a touch of xanthan gum to replicate elasticity. Be aware that gluten-free dough behaves differently, so monitor rising times closely.
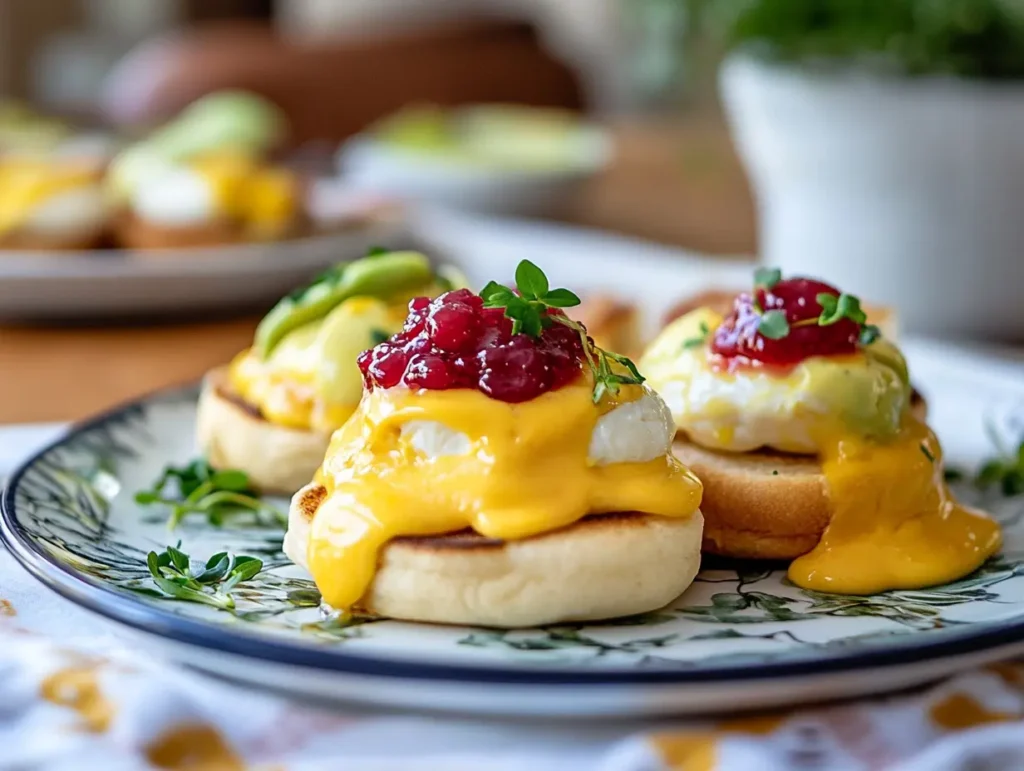
Serving Suggestions and Pairings
English muffins are incredibly versatile, making them an excellent addition to almost any meal. Their soft yet slightly crispy texture pairs beautifully with both sweet and savory flavors. In this section, we’ll explore classic toppings, modern twists, and creative combinations that elevate these muffins to culinary excellence.
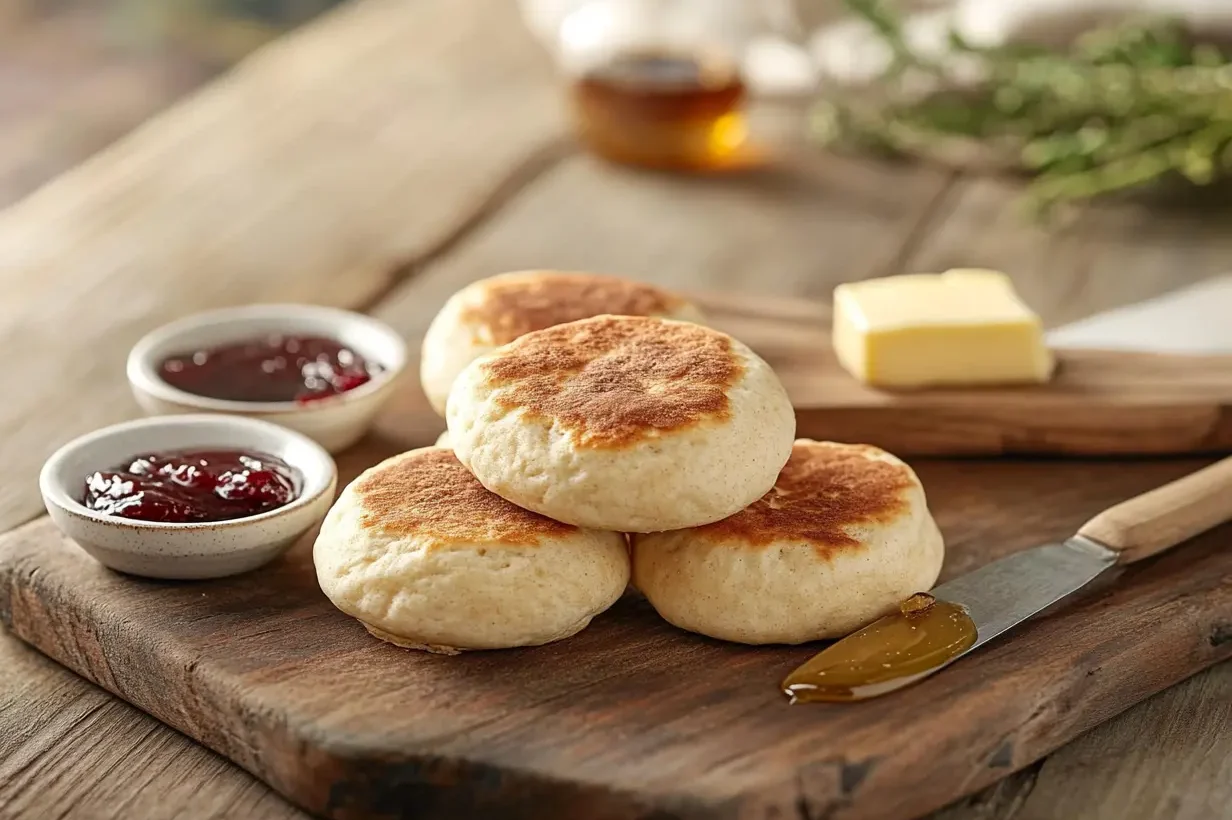
Classic Toppings
Traditionally, English muffins are enjoyed with a simple spread of butter or jam. The warmth of the muffin melts the butter, creating a delectable bite, while fruit jams or marmalades add a touch of sweetness. For breakfast lovers, topping them with scrambled eggs, crispy bacon, or melted cheese is a timeless choice.
- Butter and honey for a silky and sweet finish.
- Jam or preserves for fruit-forward flavors.
- Eggs Benedict: Top with poached eggs, ham, and hollandaise sauce.
Modern Twists
For those who like to experiment, English muffins can be transformed into gourmet treats. Consider spreading avocado for a rich, creamy base that pairs well with a sprinkle of red chili flakes or smoked salmon. Alternatively, use nut butters like almond or peanut butter for a protein-rich snack.
- Avocado spread with sea salt and lemon juice.
- Smoked salmon with cream cheese and capers.
- Nut butters topped with banana slices or a drizzle of honey.
These creative pairings not only enhance the muffins’ flavor but also add a modern, health-conscious twist to your table. Whether for a leisurely brunch or an on-the-go snack, these suggestions will make your English muffins the highlight of any meal.
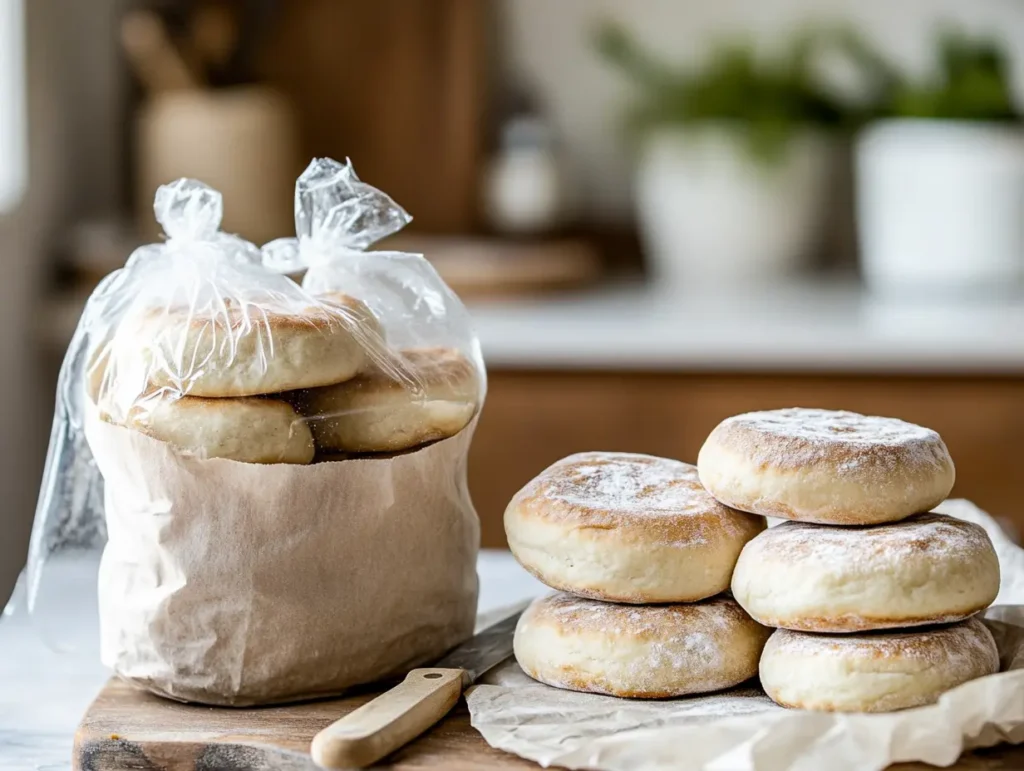
Storing and Freezing Your English Muffins
Learning how to make English muffins is a rewarding experience, and proper storage ensures that your hard work lasts longer. Whether you’re storing them for the week or freezing a batch for later, following these tips will preserve the freshness and texture of your muffins.
Proper Storage Techniques
To keep your English muffins soft and flavorful, allow them to cool completely before storing. Place them in an airtight container or resealable plastic bag at room temperature. They will stay fresh for three to five days.
- Store at room temperature in a cool, dry place.
- Use parchment paper to separate muffins to avoid sticking.
Freezing Instructions
If you’ve made a larger batch, freezing ensures they remain delicious for up to three months. To freeze, wrap individual muffins in plastic wrap and place them in a freezer-safe bag.
- Freeze individually wrapped muffins to avoid freezer burn.
- Reheat frozen muffins by toasting them directly, without thawing.
With these techniques, your homemade English muffins will always be ready to enjoy, fresh and warm, no matter when the craving strikes.
FAQs: How To Make English Muffins
If you’re wondering about specific aspects of how to make English muffins, this section answers the most commonly asked questions. From ingredients to troubleshooting, we’ve compiled practical insights for a seamless baking experience.
What causes English muffins to have holes?
The signature nooks and crannies in English muffins result from proper dough hydration and yeast fermentation. Ensuring the dough is soft and allowing ample rising time are key to achieving the bubbly texture.
Can I use all-purpose flour instead of bread flour?
Yes, you can replace bread flour with all-purpose flour, but the texture might be slightly less chewy. Bread flour contains more protein, which contributes to a sturdier structure.
How long do homemade English muffins last?
Homemade muffins will remain fresh for three to five days at room temperature when stored properly. If frozen, they can last up to three months while maintaining their quality.
Can I make English muffins without yeast?
While yeast is traditional, you can opt for baking powder and baking soda as alternatives. These will yield less airy muffins but still taste delightful.
What is the best way to reheat them?
To reheat English muffins, slice them in half and toast them. Toasting ensures a crispy exterior while warming the inside evenly.
These answers aim to address common concerns so that even beginners can confidently bake perfect muffins. If you have more questions, feel free to leave a comment below!
Conclusion
Making English muffins at home is a delightful journey filled with aromatic smells and rewarding results. From mixing the dough to enjoying the finished product, every step contributes to your culinary skills and creativity.
We’ve covered everything from how to make English muffins to serving suggestions, storage, and troubleshooting. By following these tips and techniques, you’re sure to achieve bakery-quality results in your own kitchen.
Now it’s your turn! Gather the ingredients, follow the steps, and don’t forget to experiment with unique toppings or variations. Share your creations and ideas in the comments—we’d love to see how you make this recipe your own. Happy baking!
For more professional tips on baking English muffins, check out King Arthur Baking’s detailed guide on crafting homemade English muffins: King Arthur Baking – English Muffin Recipe.