Picture this: You’re baking a loaf of bread, the aroma fills your kitchen, but when you open the oven, something feels off. Instead of a golden crust, your bread looks pale and unappetizing. Frustrating, isn’t it? This disappointing result often leads bakers to ask, *”Why is my bread not browning?”* The answer lies in a mix of science, technique, and troubleshooting.
In this article, we’ll dive into why bread browning is so essential and explore common reasons behind this baking challenge. From the science of the Maillard reaction to issues with oven temperature and dough moisture, we’ll untangle the mystery. More importantly, we’ll offer actionable tips and solutions to help you bake perfectly browned bread every time.
Let’s dive into the science behind bread browning, common culprits, and ways you can troubleshoot for a better bake!
The Science Behind Bread Browning
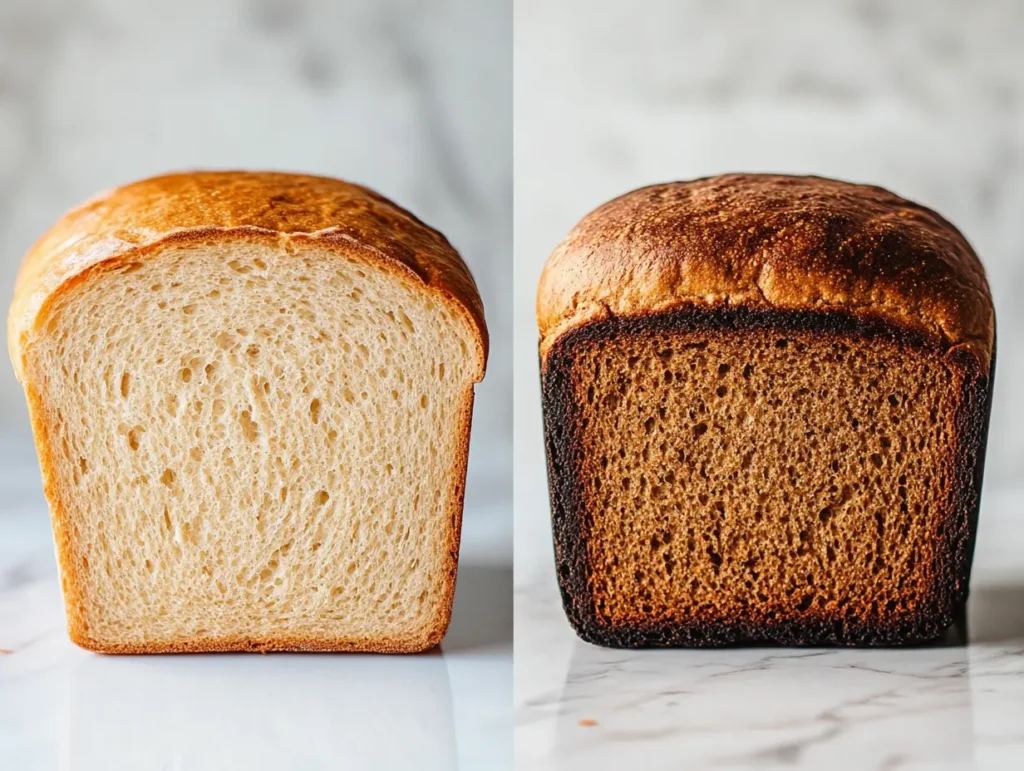
Bread browning goes beyond aesthetics—it’s rooted in chemistry. The magical golden crust forms through a chemical process called the Maillard reaction. This reaction occurs when proteins and sugars interact at high heat, creating that irresistible color, aroma, and flavor.
The Maillard reaction is affected by several factors, including heat, moisture levels, and specific ingredients in your dough. Without proper conditions, this reaction may not fully occur, leaving your bread pale and underwhelming. Transitions like sufficient heat and hydrated dough play a critical role here.
Browning also does more than enhance your bread’s appearance. It intensifies flavors, creating the deep, toasty notes we associate with perfectly baked bread. The texture also benefits as the crust becomes wonderfully crisp while the inside remains soft. Browning, in essence, transforms bread from good to unforgettable.
Understanding the science helps you identify where things might be going wrong. But, as we’ll explore next, the reasons for failed browning go beyond just chemistry.
Tired of uneven toasting? Learn how to toast bread without oil for consistent results every time. Read more here.
Common Reasons Why Bread Isn’t Browning
Several factors can contribute to poor browning, each with its own unique remedies. Knowing these causes is the first step toward troubleshooting.
- Low Oven Temperature: If your oven isn’t hot enough, the surface proteins and sugars won’t caramelize properly.
- High Dough Moisture: Excess water in the dough can create steam that inhibits the formation of a crisp, browned crust.
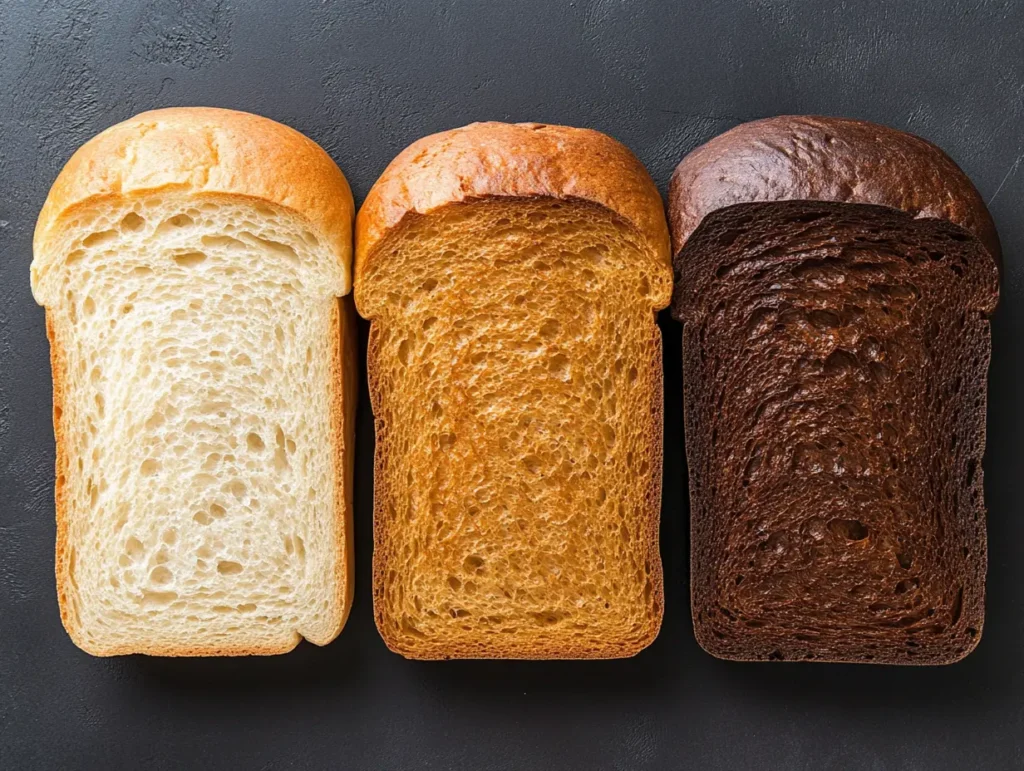
- Ingredient Imbalance: Bread recipes with little sugar may struggle to brown, as sugar speeds up the Maillard reaction.
- Short Baking Times: Taking your bread out too early prevents enough browning from developing.
- Incorrect Rack Placement: Baking on the wrong oven rack can lead to uneven heat distribution, affecting the crust.
Each factor plays a pivotal role in the final color of your bread. By addressing these specific issues, you can create the ideal environment for browning. Furthermore, learning to identify the primary problem will help you adjust your baking process effectively.
Next, we’ll focus on a key element that often flies under the radar—your oven’s accuracy.
Not just bread issues! Discover why English muffins can be hard to toast and how to overcome the challenge. Find out now.
Oven Temperature Accuracy
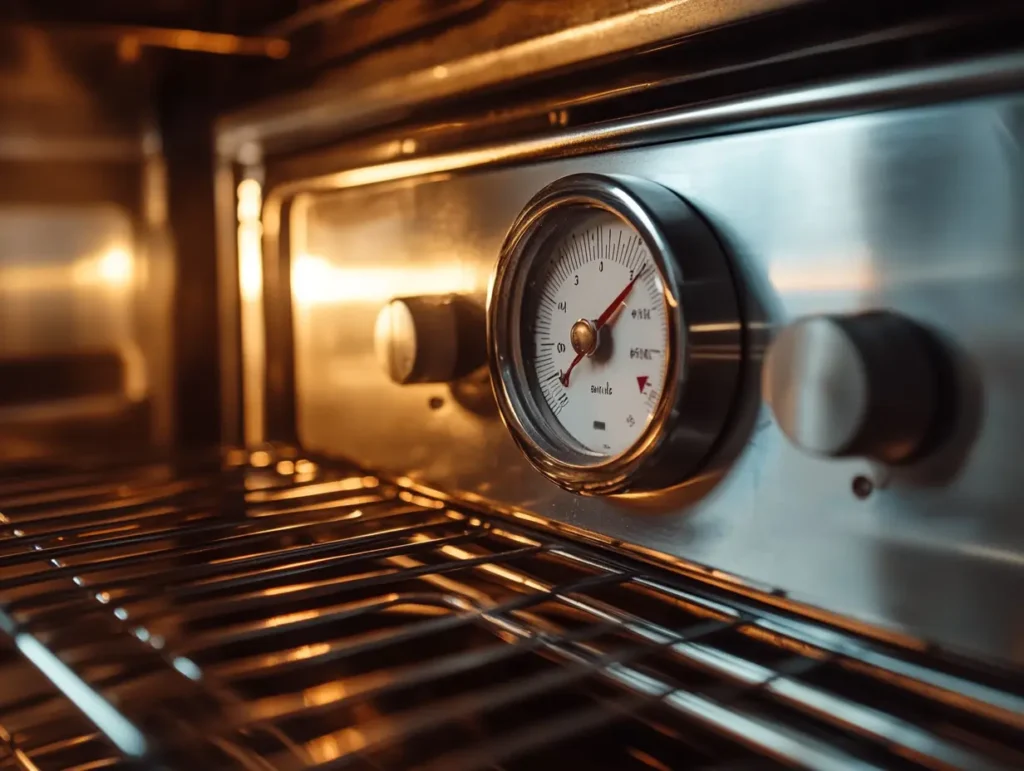
Your oven’s temperature is the cornerstone of successful bread baking. If it’s off, even by a small margin, it can drastically affect the color and texture of your crust. Unfortunately, most home ovens don’t maintain perfect temperature accuracy, which can be a significant roadblock.
To ensure even browning, start by checking your oven’s actual heat. The easiest way to do this is with an oven thermometer. Place it in the center of your oven, preheat, and compare its reading to your oven setting. Any discrepancy means your oven needs calibration.
If you discover that your oven is too cool, try adjusting the settings manually. For example, increasing the temperature slightly (around 10–15 degrees Fahrenheit) can compensate for inaccuracies. Additionally, be mindful of preheating thoroughly before placing your dough in the oven.
An unevenly heating oven can also lead to pale bread, even if your temperature is correct. To mitigate this, rotate your baking tray halfway through baking or try testing different rack positions until you find the sweet spot.
With proper oven temperature management, you’ll take a big step toward browning success. But don’t forget—baking time also plays a significant role in crust color, which we’ll cover next.
Perfect your toasting game. Understand why bread toasting takes longer and how to optimize your toaster settings. Explore this topic.
Baking Time and Its Impact
Baking time plays a crucial role in achieving that perfect, golden-brown crust on your bread. If your bread isn’t browning as expected, the culprit might be underbaking or overbaking. When you take the bread out of the oven too early, it doesn’t give the surface enough time for the browning reactions, like the Maillard reaction, to fully develop. Conversely, overbaking can excessively dry out the loaf without necessarily improving crust color, leading to a flat, lackluster appearance.
For optimal results, stick to recommended baking times while paying attention to the specific type of bread you’re preparing. For example, a typical sandwich loaf may need 30–35 minutes at 375°F (190°C), whereas artisan breads like sourdough could take 40–50 minutes at a higher temperature, around 450°F (232°C). Baking time varies with the size and density of the loaf, so adjustments may be necessary to suit your recipe.
Keep an eye on visual cues as well. Look for an even golden hue rather than relying solely on time. Using a thermometer is another helpful trick—most bread is done when its internal temperature reaches 190–200°F (88–93°C). By monitoring these factors, you can strike the perfect balance between proper browning and thorough baking.
Curious about bread varieties? Dive into the difference between bread and English muffins for a deeper understanding of toasting preferences. Check it out.
Dough Hydration and Moisture Levels
Did you know that your dough’s hydration levels can make or break the browning process? High hydration dough (dough with a higher water content) tends to create steam during baking, which can hinder crust formation and delay browning. On the other hand, dough that is too dry may develop cracks in the crust, as the moisture necessary for even browning isn’t present.
To prevent these issues, start by carefully following your recipe’s recommended hydration levels. If you notice your bread is too moist and resistant to browning, reduce the water slightly in your next batch. You may also consider uncovering the bread during the latter part of the baking process. This allows moisture to escape, promoting browning.
Creating steam at the start of the bake helps achieve a soft crust that can brown more evenly. Spritzing water into the oven or placing a pan of water on the bottom rack promotes this steam. Combine this with proper hydration levels, and you’re on your way to a perfect loaf.
Ingredient Considerations
Do you ever wonder why certain bread recipes give you a beautifully browned crust while others don’t? The answer often lies in the ingredients. Sugar and fat are key players in the browning game. Sugar promotes caramelization, giving the crust its deep, golden hue. Similarly, fat enhances the browning process while adding richness.
If your bread isn’t browning, consider tweaking the ingredient ratios. A small addition of sugar, honey, or milk powder can make a huge difference. These ingredients speed up the browning process, particularly for lean dough recipes. If you’re aiming for a glossy, dark crust, try brushing the loaf with an egg wash before baking.
Besides sugar and fat, the type of flour you use can impact the crust color. Whole wheat and enriched flours, for instance, tend to brown faster than all-purpose or bread flour due to their higher sugar content. Consider experimenting with different combinations to find what works best for your desired crust.
For advanced bakers, using glazes like milk, cream, or butter after baking can enhance the crust’s shine and deepen the color. These techniques not only improve browning but also elevate the bread’s visual appeal and flavor.
Expand your kitchen knowledge. Discover the do’s and don’ts for a Blackstone griddle and make your cooking seamless. Learn more.
Oven Calibration and Hot Spots
If you’ve ever noticed that your bread browns unevenly, the issue might not be your recipe but rather your oven. Ovens often have hot spots—areas that get warmer than the rest of the oven cavity. These inconsistencies can lead to uneven browning, particularly if the bread is kept stationary throughout the bake.
To identify hot spots, first conduct a simple test: spread bread slices evenly on a baking sheet and bake them at 350°F (177°C) for 10 minutes. The differences in browning will reveal any temperature inconsistencies within your oven. Mark these spots and adjust your baking position accordingly.
In addition to identifying hot spots, ensure your oven is properly calibrated. Over time, oven thermometers may lose accuracy, leading to unexpected results. Investing in a standalone oven thermometer can help verify internal temperatures and make necessary adjustments. Follow your oven’s user manual to recalibrate if needed.
Lastly, consider rotating the bread halfway through the bake. Switching the position ensures even exposure to heat, reducing the risk of browned patches or pale areas. This small step dramatically improves results, especially for larger or more delicate loaves.
By mastering your oven’s quirks and maintaining calibration, you’ll be able to bake bread with a beautifully browned crust every time.
Baking Pan Types and Rack Placement
One often-overlooked factor when your bread isn’t browning is the type of pan you’re using and where you place it inside the oven. The choice of baking pan directly impacts heat absorption and distribution, affecting how well the crust forms. Metal pans, particularly dark-colored ones, absorb heat faster than glass or ceramic alternatives, which tend to reflect heat and bake more slowly. If your bread consistently fails to brown, consider switching to a darker, heavier metal pan for improved heat conductivity.
Rack placement also matters significantly. Bread placed too high in the oven might overcook the top before the crust has a chance to brown evenly, while a loaf set too low might bake unevenly. The center rack is often ideal for most bread recipes since it ensures the heat circulates effectively and evenly around the loaf. Transitioning to optimal rack placement results in visible improvements to your bread’s crust color.
When adjusting your baking method, try experimenting with pan-and-rack combinations. For instance, using a baking stone placed on a middle rack can replicate the hot, even heat of a traditional bread oven, improving browning. Remember, even small changes can lead to picture-perfect bread every time.
Troubleshooting Tips for Perfectly Browned Bread
Even with adjustments to your baking setup, there might still be times when your bread refuses to brown. Thankfully, troubleshooting common issues can help you achieve that golden-brown crust every baker desires. First, evaluate whether you’re preheating your oven adequately. Failing to do so could disrupt the Maillard reaction—the key process behind browning.
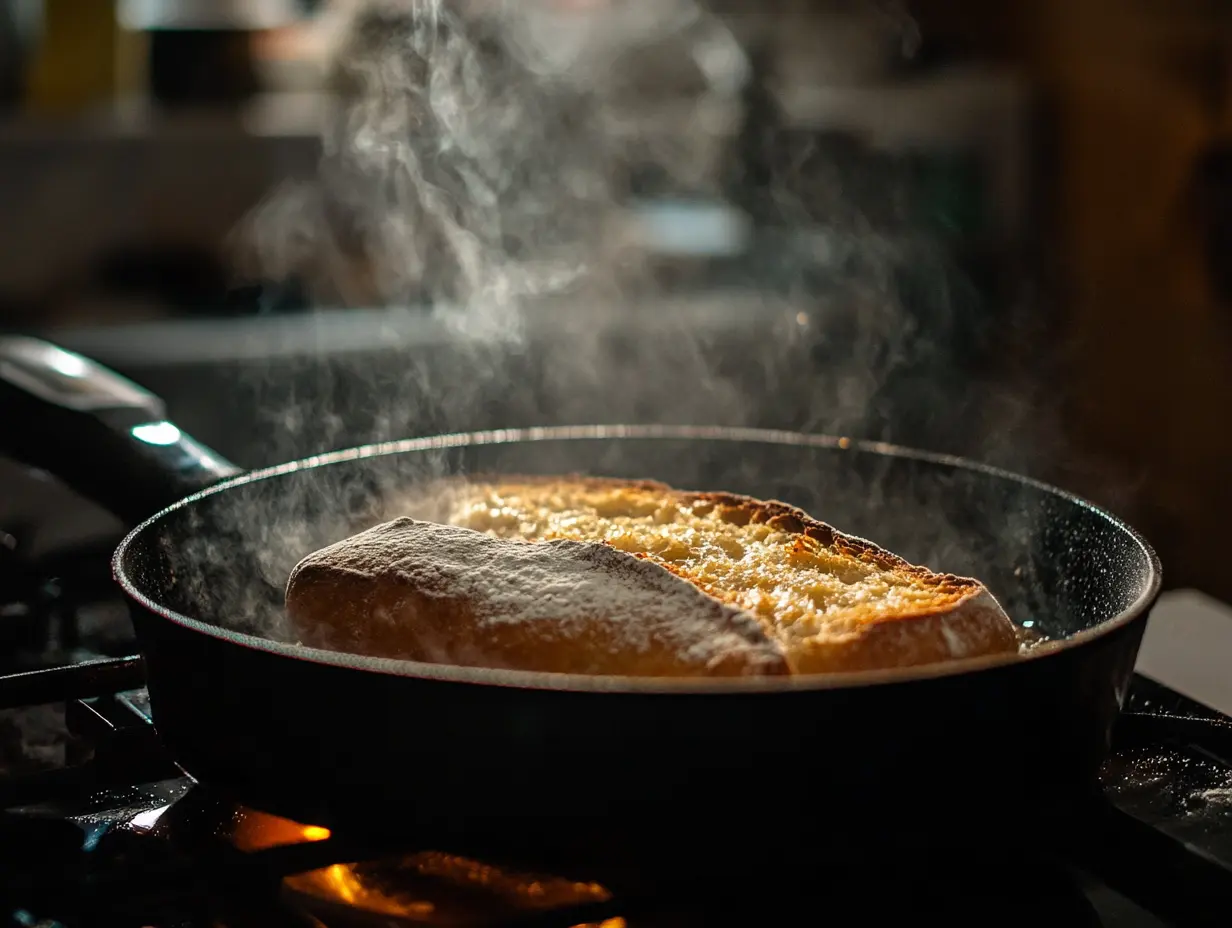
Another tip is to add steam to your baking process. By introducing steam during the first 10-15 minutes of baking, you can increase oven spring and better develop the crust. Place a small pan of hot water or a few ice cubes inside the oven to create steam. Additionally, incorporating an egg or milk wash before baking can enhance crust color, thanks to the sugars and proteins caramelizing during the bake.
If all else fails, examine the recipe itself. Consider adding a touch of sugar or honey to encourage browning, particularly if your dough lacks natural sweetness. Ensure accurate oven calibration using an oven thermometer as the ultimate troubleshooting tool. When combined, these steps make any loaf bakery-worthy.
Customizing these strategies and evaluating your method against troubleshooting basics can help you tackle any browning issue head-on.
Variations and Tips for Different Bread Types
Not all bread recipes behave the same, so adjusting your approach based on the type of bread you’re baking is crucial. Artisan breads like sourdough or baguettes benefit from high hydration levels and longer baking times. To encourage browning, use a baking stone for these types, and bake in a hot oven—typically around 450°F—while incorporating steam to develop a crispy, golden crust.
For gluten-free bread, achieving browning can be a bit trickier. Gluten-free flours often lack the proteins and sugars that brown naturally, but adding ingredients like xanthan gum or powdered milk can aid crust formation. Additionally, using a high-quality glaze or coating the loaf in seeds can provide an added layer of browning.
Soft sandwich loaves require a different approach. Lower baking temperatures, around 375°F to 400°F, allow the soft crumb to remain moist while still developing a golden crust. A light egg wash or butter glaze right before baking enhances browning for these bread types without over-drying.
The extra effort to tailor your technique to specific bread types ensures reliable results, no matter the recipe.
Bread not browning enough? Explore how the oil down process can impact toasting results on a griddle. Read the full guide.
Frequently Asked Questions (FAQ)
Why Isn’t My Bread Browning Even After Extended Baking?
If your bread still isn’t browning after extended baking, the issue may lie in inadequate oven temperatures or poor ingredient ratios. Test oven accuracy with a thermometer and increase sugar in your recipe to promote caramelization.
Can Covering the Bread While Baking Prevent Browning?
Yes, covering bread with foil or a lid early in baking can trap steam and delay browning. Remove coverings during the final 10-15 minutes to allow the crust to develop fully and brown evenly.
Does the Type of Flour Affect How My Bread Browns?
Yes, flour type plays a significant role. Whole-grain and unbleached flours often brown faster due to their protein and sugar content. Refined flours may require added enhancers like a glaze for optimal crust color.